
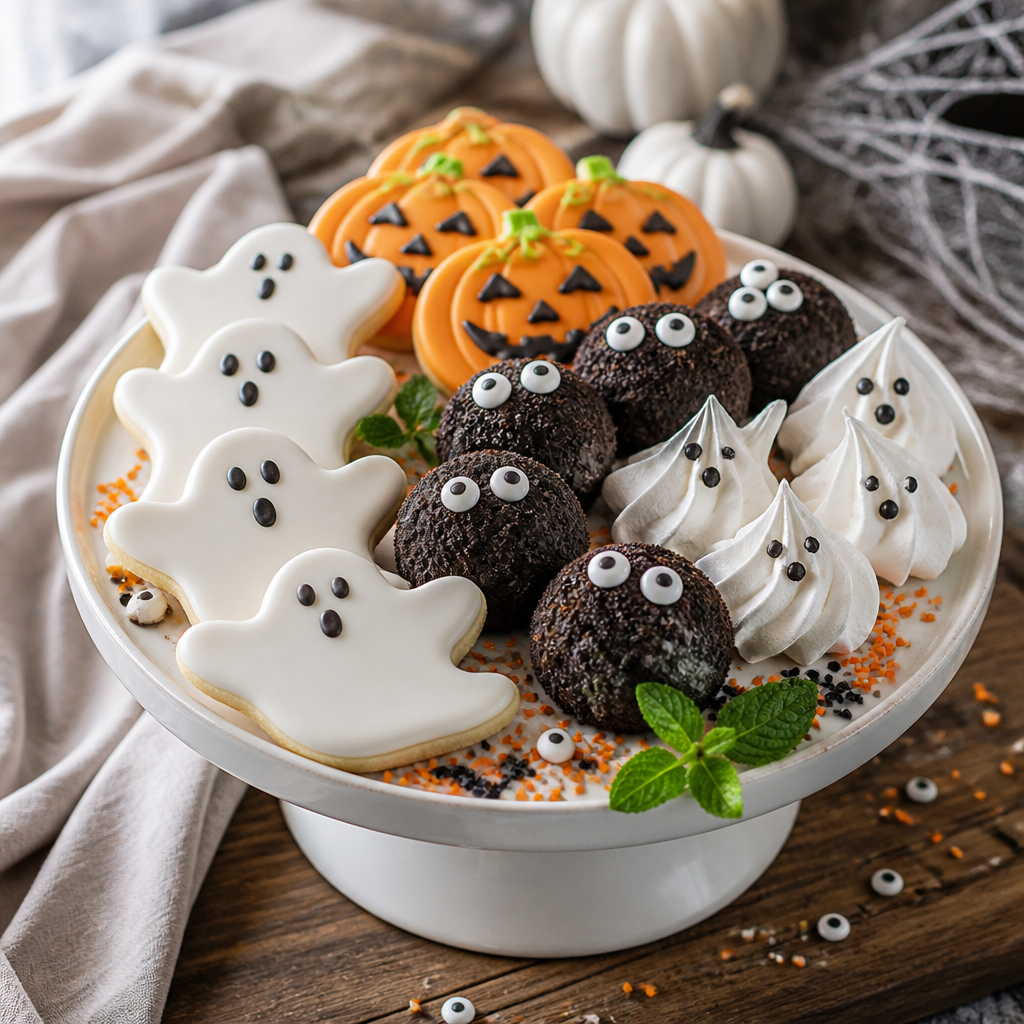
Halloween cookies are the ultimate way to bring spooky fun and delicious flavor to your kitchen this season. These buttery treats are crisp on the edges, soft in the middle, and absolutely perfect for decorating with ghoulish icing, playful candies, and all your favorite spooky designs. With this easy recipe, you’ll master festive halloween cookies in under an hour, whether you’re a beginner baker or a creative pro looking to whip up treats everyone will love.
What makes this halloween cookies recipe truly special? It’s kid-friendly, perfect for parties, and totally adaptable for gluten-free or vegan diets—meaning everyone can grab a cookie or three. Expect just 20 minutes of hands-on prep and zero fancy equipment, so you can enjoy more time with friends, family, and goblins galore.
🍽️ Recipe At A Glance
- Prep Time: 20 minutes
- Cook Time: 10 minutes
- Difficulty: Easy
- Servings: 24 cookies
- Why This Recipe Works
- Ingredients You’ll Need
- Step-by-Step Cooking Instructions
- Recipe Variations & Dietary Modifications
- Serving Suggestions & Pairings
- Storage & Meal Prep Tips
- Nutritional Information
- Conclusion
- FAQ
Why This Recipe Works
These halloween cookies are melt-in-your-mouth delicious, with just the right balance between buttery crumb and sweet vanilla. What makes them shine is their sturdy texture—perfect for pressing out bat, ghost, or pumpkin shapes without losing those crisp edges.
Classic sugar cookie dough is given an upgrade with a hint of almond extract and brown sugar for depth, making each bite aromatic and rich. Royal icing sets up glossy and snappy, so your spooky, googly-eyed monsters hold up on a party platter for hours.
Whether you want to get creative with gel food coloring or keep it simple with sanding sugar and chocolate chips, these cookies are a blank canvas for Halloween magic. They’re made from pantry staples, quick to assemble, and can easily be doubled or tripled for a crowd. Check out our easy sugar cookies for a basic variation, then come back for even more spooky inspiration.
Ingredients You’ll Need
- 2 and 1/2 cups (315 g) all-purpose flour — sifted for lighter cookies
- 3/4 cup (170 g) unsalted butter, softened — use quality, real butter for flavor
- 1 cup (200 g) granulated sugar — superfine works best for smooth dough
- 1/4 cup (50 g) light brown sugar — deepens color and adds moisture
- 1 large egg — at room temperature blends smoothly
- 1 teaspoon vanilla extract — pure is best
- 1/2 teaspoon almond extract — optional, but highly recommended
- 1/2 teaspoon baking powder — for gentle lift
- 1/2 teaspoon salt
- Halloween-themed sprinkles, M&Ms, candy eyeballs — as desired
- Royal Icing:
- 2 cups (240 g) powdered sugar
- 2-3 tablespoons milk or water
- 2 teaspoons light corn syrup (for shine & set)
- 1/2 teaspoon vanilla extract
- Gel food coloring (orange, black, green, purple)
Step-by-Step Cooking Instructions
- Make the dough: In a large mixing bowl, cream the softened butter, granulated sugar, and brown sugar on medium speed for 2-3 minutes until light and fluffy. The mixture should look pale and airy.
- Beat in the egg, vanilla extract, and almond extract, scraping down the sides as needed.
- Whisk together flour, baking powder, and salt in a separate bowl. Gradually add the dry ingredients to the wet mixture, mixing on low until no dry flour remains. Stop as soon as a soft dough forms.
- Divide the dough in half and flatten into two discs. Wrap tightly in plastic wrap and chill for at least 30 minutes. This makes halloween cookies easy to cut and helps keep the shapes crisp.
- Roll and cut: Preheat your oven to 350°F (175°C). On a lightly floured surface, roll out one dough disc to 1/4-inch thickness. Cut with Halloween-themed cookie cutters and place on parchment-lined baking sheets about 2 inches apart.
- Press decorative candies and sprinkles into some of the cookies for built-in designs.
-
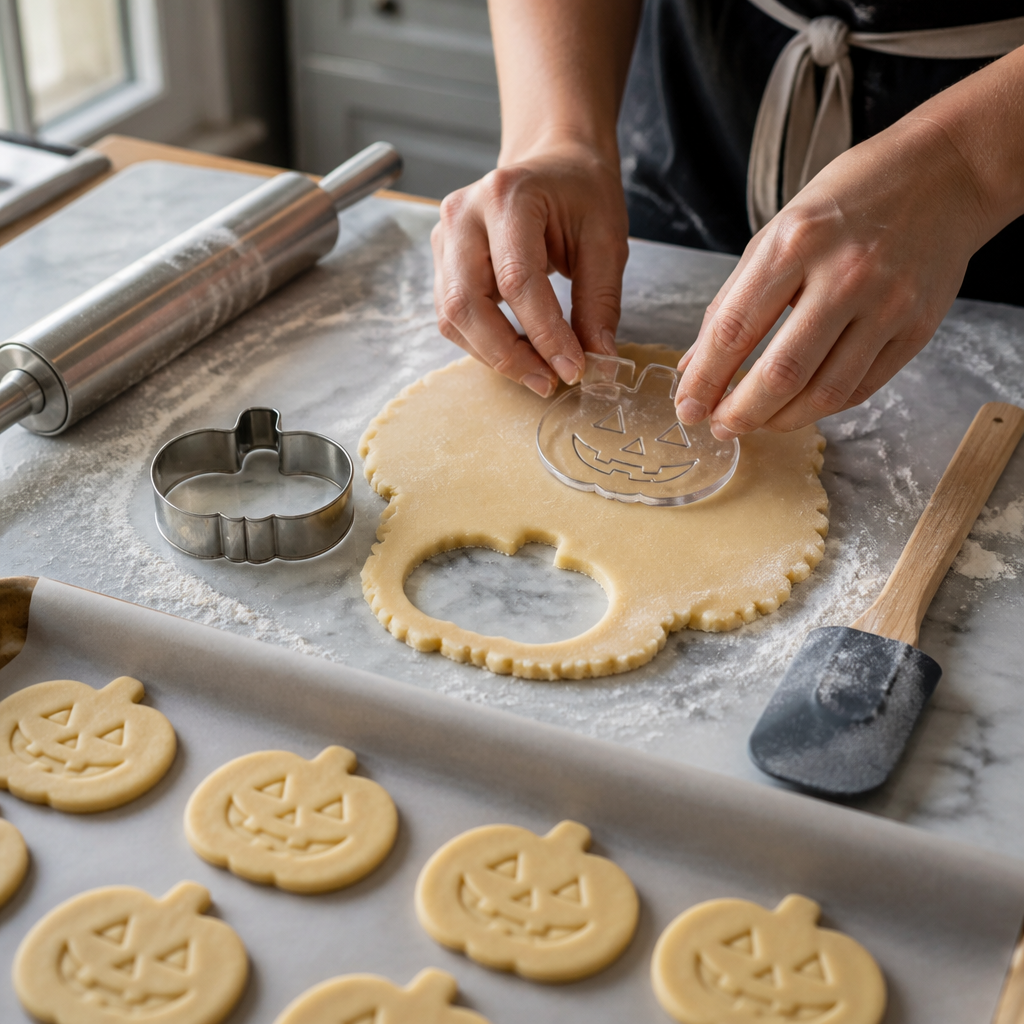
Halloween Cookies: Easy 20-Minute Recipe That Kids Love 5 Bake: Bake for 9-11 minutes, just until edges turn very light golden but centers still look pale and slightly underdone. Let halloween cookies cool on the sheet for 5 minutes—this helps them set—then transfer to a rack to cool completely.
- Make royal icing: Whisk together powdered sugar, milk, corn syrup, and vanilla until smooth and glossy. Divide into bowls and tint each with gel food coloring. Spoon into Royal Icing bags or zip-top bags with a tiny cut in the corner.
- Decorate: Once cookies are fully cool, use the colored royal icing to pipe outlines, fill surfaces, and add spooky faces or webs. Top with candy eyeballs, sprinkles, or M&Ms as desired. Let icing dry for at least 1 hour before serving or packaging.
Recipe Variations & Dietary Modifications
- Keto/Low-Carb Halloween Cookies: Replace all-purpose flour with almond flour (use 2 3/4 cups), swap sugar for a 1-to-1 granulated erythritol blend, and use keto-friendly chocolate chips for decorating. Monitor bake time—these cookies brown faster, ready in 8-9 minutes.
- Vegan/Vegetarian Halloween Cookies: Use vegan butter and substitute the egg with 3 tablespoons of unsweetened applesauce or a flaxseed “egg” (1 tablespoon ground flax + 2.5 tablespoons water, rested). Use your favorite plant-based milk for the icing.
- Gluten-Free Halloween Cookies: Swap regular flour for a 1-to-1 gluten-free baking blend containing xanthan gum. Gluten-free dough can be softer; add a tablespoon extra flour if needed to prevent sticking.
- Spicy Halloween Cookies: For grown-up heat, add 1/2 teaspoon ground cinnamon and a pinch of cayenne to the dough. A sprinkle of chili salt on the icing brings a devilish kick!
Most substitutions may adjust final texture or flavor slightly, but you’ll still enjoy festive, scrumptious cookies for everyone. For more allergy-friendly ideas, explore easy chocolate cake and eggless brownies.
Serving Suggestions & Pairings
For maximum effect, arrange your halloween cookies on a black or orange platter, stacking different shapes and colors for whimsy. Scatter a few candy eyeballs or tiny trinkets (non-edible!) among them for party flair.
Pair these cookies with mugs of hot spiced cider, rich hot chocolate, or even “witches’ brew” punch for kids. Adults might love a sweet Riesling or mulled wine alongside. For an ultimate treat table, serve these alongside chocolate chip muffins or bowls of caramel popcorn.
Garnish with extra royal icing drizzles, edible glitter, or even a light dust of cocoa powder “dirt” for a haunted graveyard effect—all eyes will be on your cookie platter!

Storage & Meal Prep Tips
To keep your halloween cookies fresh, store them in an airtight container at room temperature for up to 1 week. If you used royal icing, make sure it is fully set before stacking to avoid sticking.
For longer-term storage, layer cookies between parchment in an airtight freezer-safe box. Freeze undecorated (preferred!) or fully iced cookies for up to 2 months. Thaw in layers on the counter for 1-2 hours—this prevents condensation and sticky icing.
To re-crisp cookies, pop them in a 325°F oven for 3-5 minutes. For party prep, bake and freeze cookies up to a month ahead, then thaw and decorate the day before your event. No last-minute messes!
Nutritional Information
Nutrition Facts (per serving):
Calories: 120 kcal | Protein: 1.5 g | Carbs: 20 g | Fat: 4.5 g | Fiber: 0.3 g
For more detailed nutritional data about ingredients, check out this USDA FoodData Central link, and learn about icing options at King Arthur Baking.
Conclusion
Making halloween cookies at home turns an ordinary day into an unforgettable celebration—no costume required! With this easy, dependable recipe, you’ll create halloween cookies that everyone wants to reach for, whether you’re handing them out to trick-or-treaters or serving at a family table.
These halloween cookies bring friends and families together, sparking creativity in the kitchen and sweet memories that last long after the season ends. I’d love to see how your halloween cookies turn out—share your photos, leave a comment below, or tag me on social to show off your spooktacular creations. Happy baking and haunting!
FAQ
How can I make halloween cookies ahead of time?
You can make the dough up to 3 days in advance and keep it wrapped in the fridge. Or, freeze cut-out, unbaked cookies on trays, then bake and decorate the day of your party for fresh flavor and no rush.
My halloween cookies spread too much—how do I fix that?
Make sure your butter isn’t melted and that you chill the dough well before rolling. Freezing the shaped cookies for 10 minutes before baking ensures crisp, defined shapes.
What’s the best way to decorate halloween cookies without royal icing?
Try simple buttercream, melted chocolate, or even cream cheese frosting. You can also use candy melts and edible markers for easy, mess-free designs!
Are these halloween cookies suitable for people with nut allergies?
Yes—just omit the almond extract, and make sure all other ingredients (especially decorations) are nut-free. Always check candy labels for allergy information.
How long do halloween cookies stay fresh?
Halloween cookies will stay delicious in an airtight container at room temperature for up to 7 days, or can be frozen (baked or unbaked) for up to 2 months.