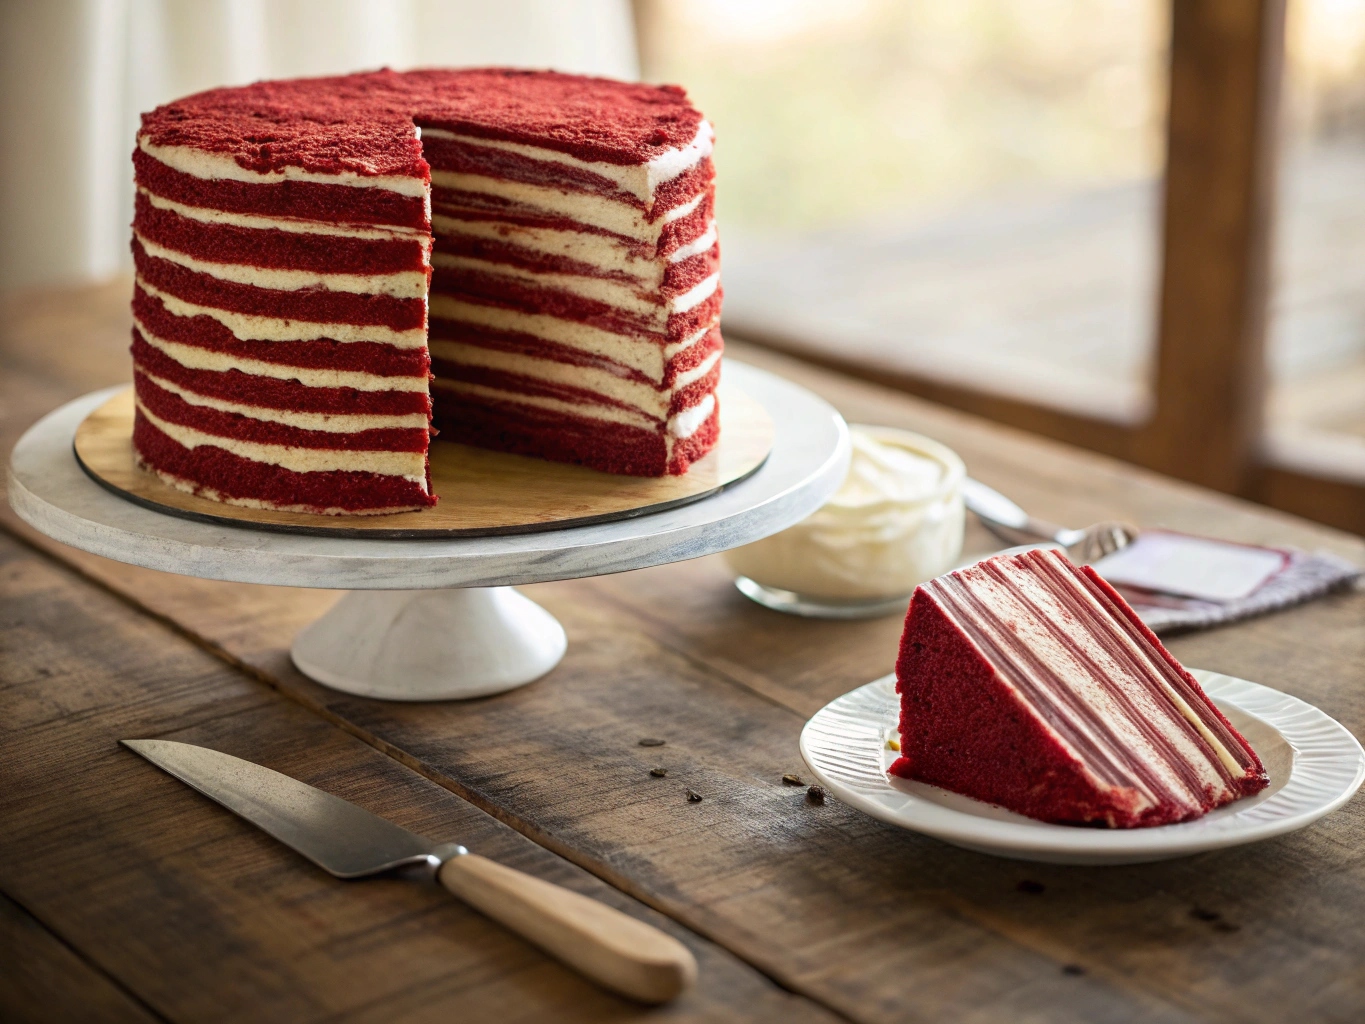
If you’ve ever wanted a dessert that’s as show-stopping as it is soul-satisfying, the red velvet crepe cake is your answer. This beauty stacks delicate, cocoa-kissed crepes with luscious cream cheese filling until you’ve got an irresistible tower of flavor. In this article, I’ll take you through the story behind my obsession with this stunning cake, break down the process into simple steps, share useful tips, and answer your most common questions. Whether you’re baking for a birthday, brunch, or just a Sunday craving, this red velvet crepe cake might just become your new favorite.
Why Red Velvet Crepe Cake is My Go-To Celebration Dessert
A cocoa-kissed memory from my grandma’s kitchen
My love for red velvet anything started early. I was maybe thirteen, and my grandma had just handed me a well-worn recipe card that simply read “Red Velvet Cake – for Sunday.” I remember mixing that deep red batter, streaking my apron and the counter with joyful mess. But it wasn’t until years later, during a quiet winter weekend, that I thought to turn that beloved flavor into crepes. Something magical happened. These weren’t just pancakes in disguise—they were delicate, whisper-thin folds of cocoa warmth stacked high with tangy cream cheese clouds. That first red velvet crepe cake was a little crooked, but I was hooked.
In our home just outside Asheville, North Carolina, we don’t need a holiday to make one. It’s become a go-to for birthdays, “just because” weekends, and yes—even breakups. This cake doesn’t whisper; it sings. And every time I make it, I think of that old recipe card and how food becomes memory.But this red velvet crepe cake? It has a charm of its own—just like the comforting simplicity of my vegan red velvet cake that readers keep coming back to
What makes red velvet crepe cake irresistible
It’s the perfect mix of textures and taste. The crepes are soft with just the right bite. The filling is creamy, not too sweet, and balances the slight cocoa bitterness beautifully. Stack by stack, it becomes more than just dessert—it’s an experience. You get that visual wow factor from the layers, but more than that, every bite feels like a hug. Whether it’s a tall stack or a sliceable treat like my vegan red velvet loaf cake, red velvet holds a timeless place in my kitchen.
How to Make a Red Velvet Crepe Cake from Scratch
Red velvet crepes: Thin, flexible, and full of flavor
The secret to a stunning red velvet crepe cake starts with the crepes. These aren’t your average breakfast crepes—they’ve got a touch of cocoa, a splash of buttermilk, and just enough sugar to balance everything. And yes, that rich red hue is non-negotiable. You want them thin but not too fragile, with just the right bite.
Whisking the batter is easy: blend eggs, flour, milk, buttermilk, cocoa powder, sugar, melted butter, and red food coloring until smooth. Chill it for 30 minutes (this helps them relax and stay tender). Then cook them in a nonstick pan over medium heat. Each crepe should take just about 1 minute per side. Stack them as you go, letting them cool completely before assembly.

For gluten-sensitive bakers, you can even use the same batter technique I use in my gluten-free vegan red velvet cake—just swap the flour.
Cream cheese filling: The heart of this crepe cake
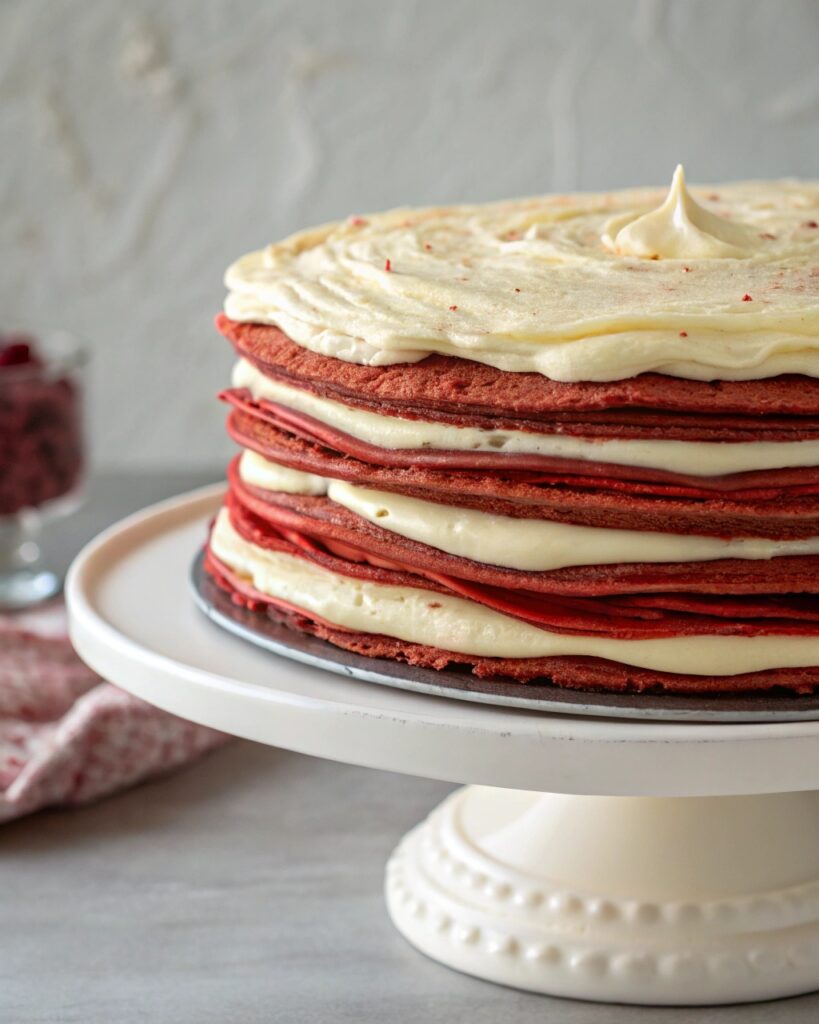
Every great red velvet dessert needs that creamy, slightly tangy counterpoint. For this cake, a whipped cream cheese filling is the dream. It’s simple: beat softened cream cheese with powdered sugar and vanilla extract, then fold in freshly whipped cream until it’s pillowy and smooth. It’s thick enough to layer, but soft enough to melt into each crepe bite.
Alternate crepe and filling until you’ve used everything. Let it chill for at least 2 hours so the layers set. The result? A slice that holds together beautifully and delivers flavor in every bite. If you’re curious about natural coloring, try the beet-based approach from my vegan red velvet cake with beetroot and apply it to this crepe recipe.
Tips for a Flawless Red Velvet Crepe Cake Every Time
Red velvet crepe cake success starts with chilling and slicing
If there’s one tip I repeat every time someone asks how to get perfect results with a red velvet crepe cake, it’s this: let it chill. After layering your crepes and cream cheese filling, wrap the entire red velvet crepe cake tightly and refrigerate for a minimum of 2 hours. I usually chill mine overnight. This allows the layers to firm up and the flavors to meld into that signature red velvet richness we all love.
When it’s time to slice, don’t rush. Use a sharp knife dipped in hot water and wiped clean between cuts. This gives you those precise, clean edges that reveal the beautiful layers of your red velvet crepe cake. It’s one of the most satisfying parts of the process—cutting through that tender stack and seeing the results of your work.Want to deepen the flavor? Add a touch of espresso like I do in my chocolate cakes with espresso glaze to give your red velvet crepe cake a slight kick.

Decorating your red velvet crepe cake with just the right touch
Red velvet crepe cake is already a visual stunner, so keep decorations light and elegant. I like to sprinkle the top with red velvet crumbs or dust it gently with cocoa powder. Sometimes, I’ll add piped rosettes of cream cheese filling or a few fresh raspberries for a pop of color.
For special occasions, white chocolate curls or a drizzle of ganache elevate the look while keeping the flavor profile balanced. But simplicity often speaks louder. Let the red velvet layers shine—after all, that’s what makes red velvet crepe cake so beloved.
For fruity notes, garnish with raspberries—just like the finish on my decadent chocolate raspberry cake, which also balances rich flavors beautifully
Conclusion
Red velvet crepe cake isn’t just a recipe—it’s a ritual. Every layer holds a memory, every slice brings smiles. Whether you’re serving it for birthdays, brunches, or healing heartbreaks, it never disappoints. The cocoa, the cream, the color—it all comes together in something rich but not heavy, classic but a little rebellious. I’ve baked my way through many versions, but this one? It’s home.
for more recipe follow us in Facebook page
FAQ About Red Velvet Crepe Cake
How do you make crepes for a red velvet crepe cake?
Making crepes for a red velvet crepe cake is simpler than it sounds. Blend eggs, milk, buttermilk, flour, cocoa powder, sugar, melted butter, and red food coloring until smooth. Chill the batter for at least 30 minutes—this helps the crepes cook evenly and stay tender. Use a nonstick skillet, pouring in just enough batter to coat the pan. Cook each crepe for about 1 minute per side, then cool them on a wire rack. You’ll need around 18–20 crepes for a standard red velvet crepe cake.
What kind of filling goes best with red velvet crepe cake?
A red velvet crepe cake pairs best with a tangy cream cheese filling. This classic combo echoes the flavors of traditional red velvet cake but in layered, airy form. To make it, beat cream cheese with powdered sugar and vanilla, then fold in whipped cream until light and smooth. It’s the perfect texture to hold between thin crepe layers without overpowering them.
Can I make red velvet crepe cake ahead of time?
Yes! Red velvet crepe cake actually tastes better when made ahead. Once assembled, it should be chilled for at least 2 hours, but overnight chilling deepens the flavor and ensures clean slices. Store it covered in the fridge and serve within 48 hours for best results.
What’s the difference between red velvet cake and red velvet crepe cake?
A traditional red velvet cake is baked with layers of sponge, while a red velvet crepe cake is built with thin, cocoa-rich crepes stacked high with creamy filling. The crepe version offers a more delicate texture and a visually striking appearance. It’s perfect when you want the flavor of red velvet with a lighter, more elegant twist.
Red Velvet Crepe Cake
Equipment
Ingredients
- For the Crepes:
- – 1 cup all-purpose flour
- – 2 tbsp unsweetened cocoa powder
- – 2 tbsp granulated sugar
- – 1 1/2 cups whole milk
- – 1/2 cup buttermilk
- – 3 large eggs
- – 3 tbsp unsalted butter melted
- – 1 tsp vanilla extract
- – 1 tbsp red food coloring
- – 1/2 tsp salt
- For the Cream Cheese Filling:
- – 12 oz cream cheese softened
- – 1/2 cup powdered sugar
- – 1 tsp vanilla extract
- – 1 cup heavy cream whipped
Instructions
- In a large bowl, whisk together flour, cocoa powder, sugar, and salt.
- In another bowl, mix eggs, milk, buttermilk, melted butter, vanilla, and red food coloring.
- Combine wet and dry ingredients until smooth. Chill the batter for 30 minutes.
- Heat a nonstick skillet over medium heat. Pour in 1/4 cup of batter and swirl to coat the pan.
- Cook each crepe for 1 minute per side. Stack on a cooling rack to cool completely.
- Beat cream cheese, powdered sugar, and vanilla until smooth.
- Fold in the whipped cream until fluffy and spreadable.
- Layer crepes and filling on a cake stand, smoothing each layer with an offset spatula.
- Cover the cake with plastic wrap and chill at least 2 hours or overnight.
- Slice with a hot, clean knife and serve cold.
Notes
– Best served cold. Keeps up to 2 days in the fridge.

